When it comes to localizing applications for iOS or Mac OS, things get pretty quickly messed up and cumbersome. The tool support by Apple is – friendly spoking – lacking consistency. Especially if you are updating your code and want to update the localization, things get hairy. I do not want to go into detail here because otherwise this post would never end. I would rather like to provide a (simple) solution.
Read on, if you want to know more about the background and the pre-conditions of my approach. You can however also jump directly to the solution.
Fortunately, Apple has decided to include localizations based on XLIFF in the development process of iOS and Mac applications. XLIFF is a well defined localization interchange format that bundles all localization strings in one file. Using XLIFF tools, the localization of Mac and iOS applications is straightforward. In this post, I want to present a (fairly) simple localization approach based on XLIFF.
In order to be able to localize your application, you have to encapsulate all strings in your code that appear in the user interface into NSLocalizedString pragmas. So, for instance, out of @"No Internet connection" gets NSLocalizedString(@"noInternetConnection", @"No Internet connection").
The usage of NSLocalizedString is a topic of its own. Usually, the first parameter is the actual string that should appear in the application and the second parameter contains a comment for the translator. However, I would claim that currently in the majority of cases the first parameter is used as the key and the second parameter as the default value in the base language (throughout this article, the base language will be English). The background of this approach is that the default value might change and if you used it in the first parameter and have other translations, this change would break the other translations as the first parameter is used as the key to which the translation of a string is assigned. The downside to this approach is that you have to provide a translation for your base language as well (in our case English).
The second kind of files that are translated are storyboard and NIB files. Basically, you do not have to do anything to enable their localization. Strings in these files will be recognized automatically.
So, let’s assume you encapsulated all your strings in NSLocalizedString pragmas and want to localize your application. This means that we now want to create the XLIFF files and translate them in the aftermath. Actually, Xcode allows to create (and update!) XLIFF files based on the underlying Stroyboards, NSLocalizedStrings in your code and on already existing localization resources. However, Xcode does not allow to export an XLIFF of the base language. It allows to export an empty XLIFF file based on the base language but as soon as you created and translated an English XLIFF, you cannot export an English XLIFF file including the existing translations. So, I will not cover exporting XLIFF files with Xcode (you will find a good tutorial about that here, if you like), I will rather employ the following command line command found here for each language that needs to be created OR updated:
xcodebuild -exportLocalizations -localizationPath
An example for the creation of the English XLIFF file would be xcodebuild -exportLocalizations -localizationPath . -project "North Kiteboarding.xcodeproj" -exportLanguage en. In that example, the command is executed in the directory where the file North Kiteboarding.xcodeproj is located. After executing this command, a file called en.xliff will be created containing as well the localization strings of the NSLocalizedStrings and of the storyboard and NIB files. If you have not provided a previous English localization, it contains only the keys and comments, not the actual translation. (BTW, for the English translation, you can just copy the comments into the target field.) However (and this is the big difference to previous approaches), if you had already provided a translation, the existing translations will be included in the XLIFF file. So now you (or a translation agency) can start adding the missing information.
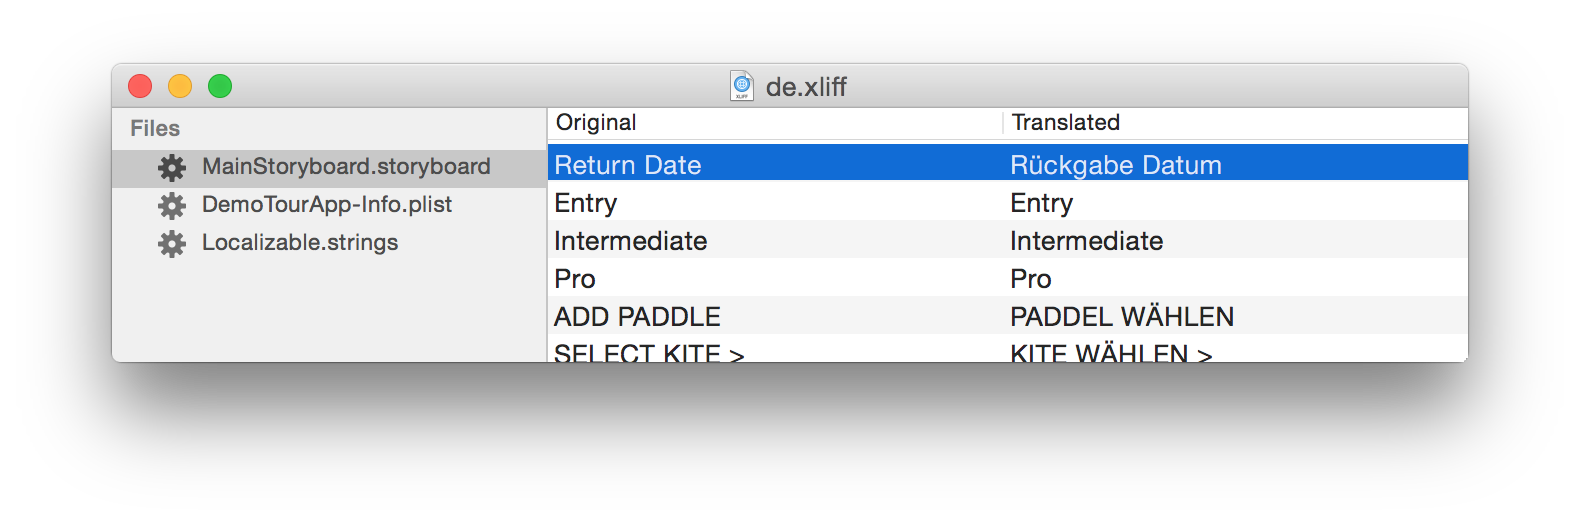
Although you could as well use a text editor, there is a range of tools available for XLIFF translation. I used a tool called iXLIFF that i found on the App Store which cost 0.99€. Using this tool, the translation looks like the following:
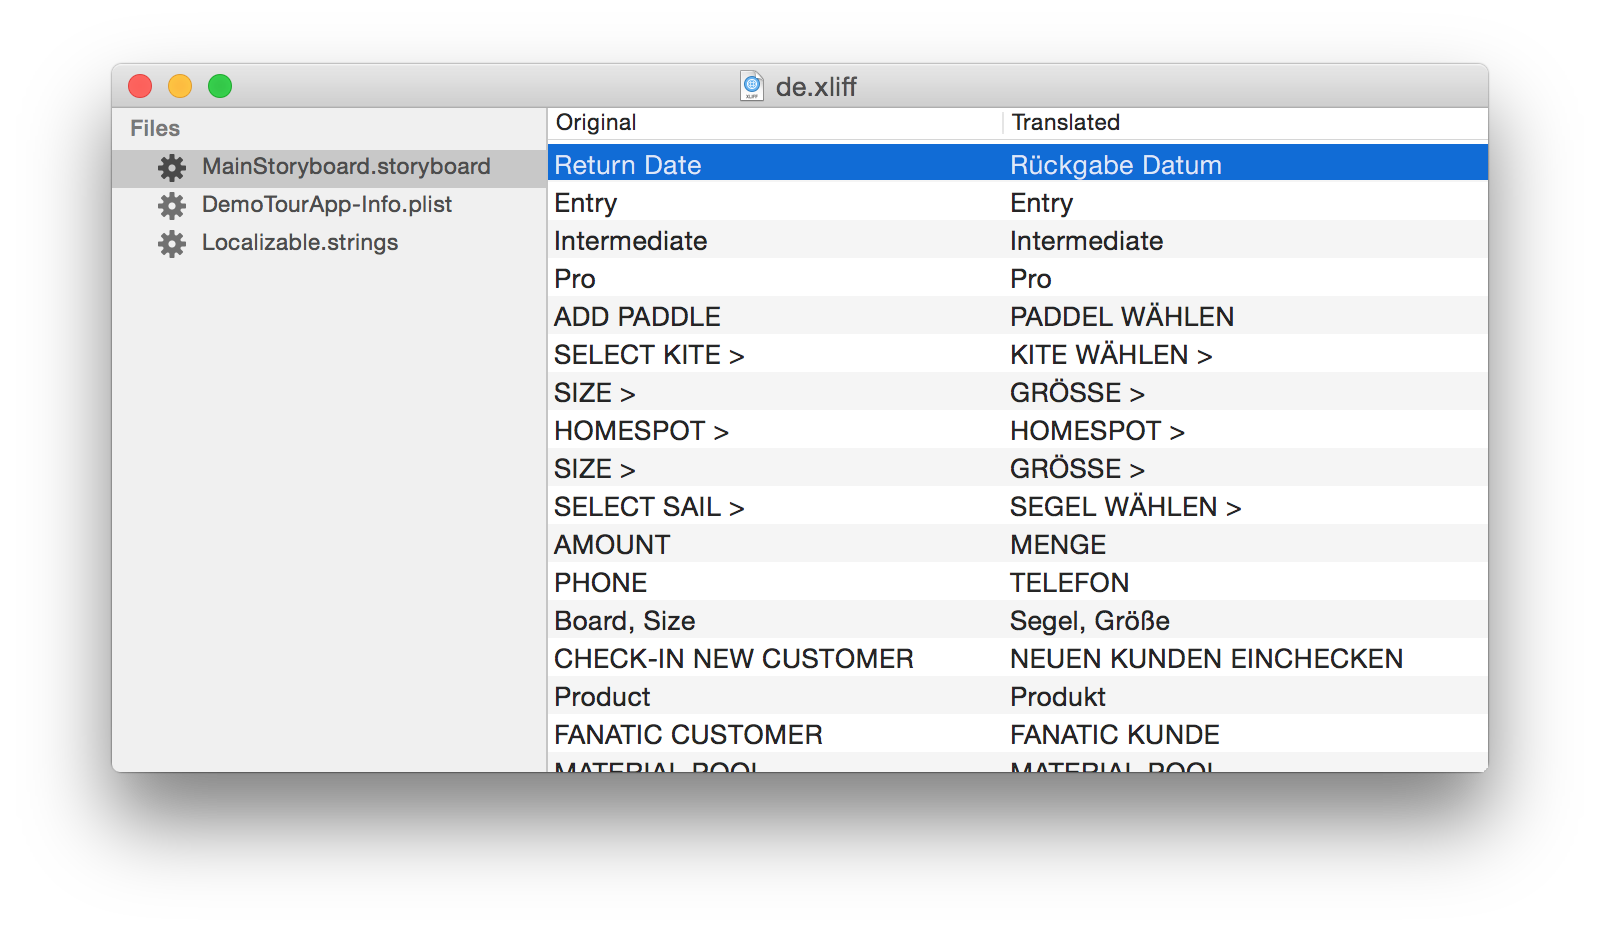
In this example, I translated an app from English to German. As you can see on the left side, the XLIFF file contains as well the strings from the storyboard as from the code (Localizable.strings).
The usage of the application is simple, just type the translations into the ‘Translated’ column.
After you finished the translation, you save the file and import it into Xcode. For the Import, select the project name in Xcode and choose Editor > Import Localizations…. (Note that Xcode will create the translation for the target language in the project file for you. You do not have to do this in advance.) Now, the app is localized in the imported language :)
Whenever you add or change strings in your code or in the storyboard, you repeat the generation of the XLIFF file for each language using the command above, add the missing information using your favorite editor (or translation agency) and import the file to Xcode.
To comprehend:
Using the introduced command line argument, you create and update a XLIFF file for each language. Existig translations in the target language will be incorporated in the XLIFF files. You translate these XLIFF files and import them back to Xcode.
That’s it. If you got comments or questions, do not hesitate to post them in the comments.