Provisioning an iOS app for in-house distributione is damn complicated. As my efforts to do so were eventually successful, I decided to prepare this comprehensive tutorial documenting my best practice approach for future reference.
You found the right tutorial if you want to be able installing an app on an arbitrary iOS device from Safari, without putting it on the App Store, without installing it via iTunes and without using the MDM approach (although for the MDM approach you should be able using the IPA and the manifest that are created in this tutorial). After performing the steps of this tutorial, you will just enter an URL in Safari on the iOS device, click a link on the site and an app automagically installs on your device.
Before you get started with enterprise provisioning, you need the following:
- You have to be (at least an admin) team member of the iOS Developer Enterprise Program. Which costs 299$ a year. The normal iOS Developer Program is NOT enough for this. Oh, and you have to apply for the enterprise program because Apple wants to be extra sure that customers can trust you and your company. And – AFAIK – the CEO has to sign the contract with Apple.
- You need a valid SSL certificate for the domain where you want to put the app. Otherwise your iOS device will not install the app from the site. Such a SSL certificate can also be fairly pricey.
The following presents the approach that worked with my setup. I used Xcode 5.1 and devices with iOS 7.1. I was also an admin member in an iOS Developer Program team. I found a lot of the settings performing the good old try and error approach. If you find something in the post that is wrong or you come up with a better solution, please post it in the comments!
To apply this post’s information, you need to have the following as a starting point:
- Your project in Xcode that you want to provision for enterprise distribution.
- An App ID for this project that you created in the iOS Developer Enterprise Program team. You will use that ID in the provisioning later on. If you have not already done so, create an appropriate App ID here. I will not go into detail on how to create the App ID.
In this post, we will create the following:
- A distribution certificate. (Jump link to the explanation how to create the certificate.)
- A provisioning profile. (Jump link to the explanation how to create the profile.)
- An IPA file and a manifest plist file that we can deploy directly from the web on an iOS device. (Jump link to the explanation how to create the IPA and manifest files.)
Create the distribution certificate
For the enterprise provisioning, you need a distribution certificate (the distribution certificate is different from the development certificate!) with which you can sign your code. This certificate is only useful for creating an app for distribution. You cannot use it for development purposes in Xcode. With this certificate active, I started the app from Xcode on my iPad, the app started but the debugger could connect to the app.
How to get the distribution certificate: Navigate to the Certificates section of the iOS Dev Center. You need to be logged in to the Enterprise Dev Center! And you need to have at least an admin role. (More on roles in the dev center.) After clicking on ‘Production‘, you will see this (sensitive parts blackened):
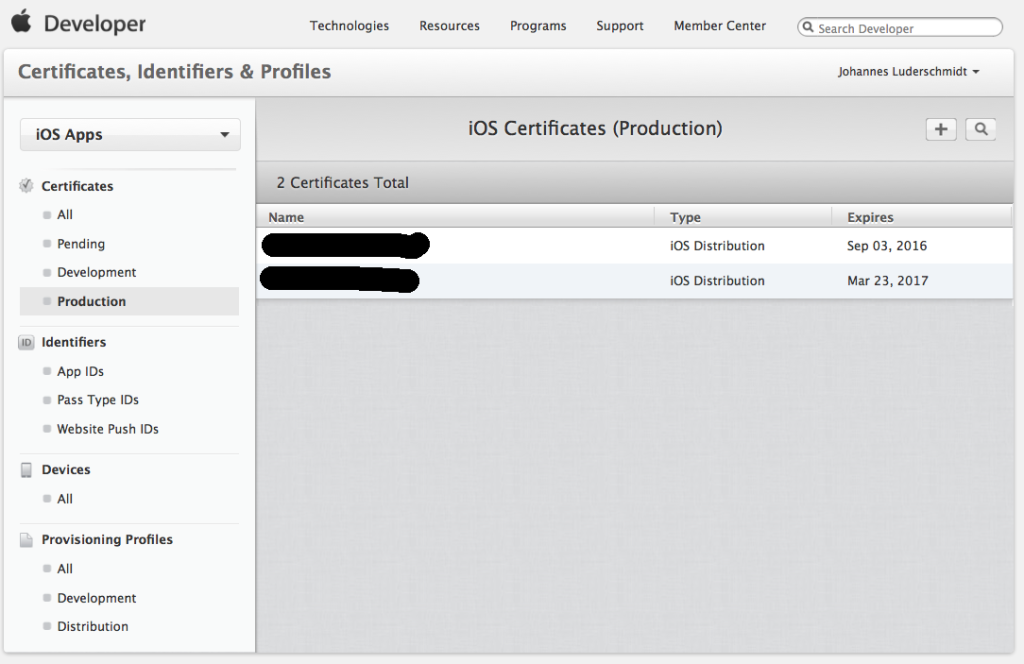
In the image above all existing certificates are listed. If you have already created a distribution certificate here, you can reuse that. However, it is important that you have created the certificate with YOUR certificate signing request file. Otherwise you will not have the private key for this certificate in your Keychain and cannot use the certificate to sign your code. If you do not know if you created the certificate, you can download the certficate in question, double-click it and watch it in the Keychain Access application. If it has got a little arrow on the left side, then you have stored the private key on your Mac and can use the certificate for the provisioning. You expand the certificate by clicking on the arrow. It should look like this:
If the arrow is missing. You do not own the private key. Either you have stored the key on another Mac. Then you should be able to transfer it to the current Mac. Or you do not have the private key. In this case you cannot use this certificate for the provisioning. Instead, you can either try it with another certificate from the developer site or you create a new one with a certificate signing request file from your Mac.
Therefore, if you have not already done so, create your distribution certificate by clicking the plus button in the upper right. You will see (something hopefully slightly different from) this:
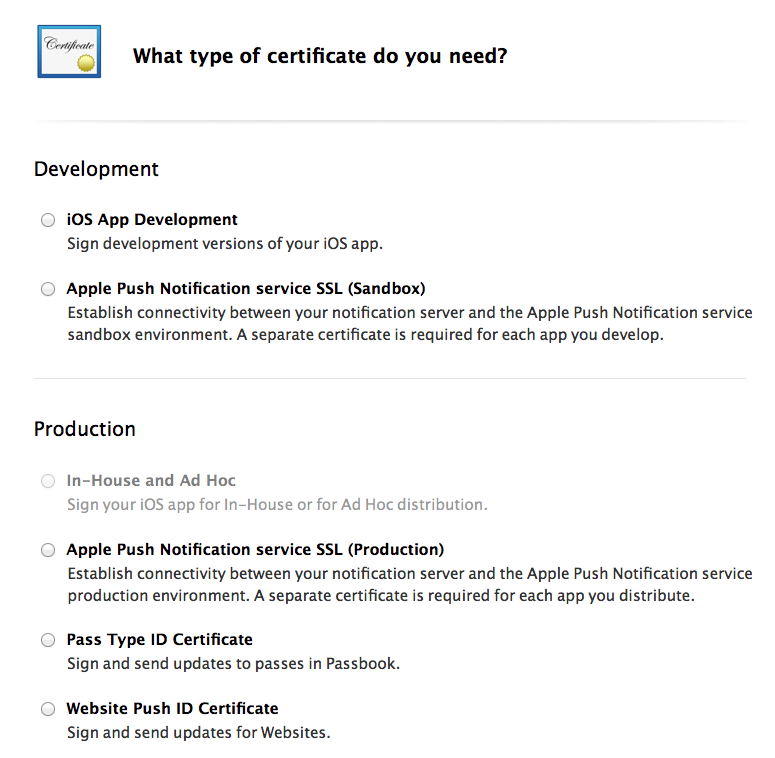
Push the radio button for ‘In-House and Ad Hoc’. I do not know why, but when creating the screenshots for this post, I could not click this button. Maybe the button was disabled because I have had already created such a distribution certificate. Anyway, you should be able to click this button.
In the next screen you see this:
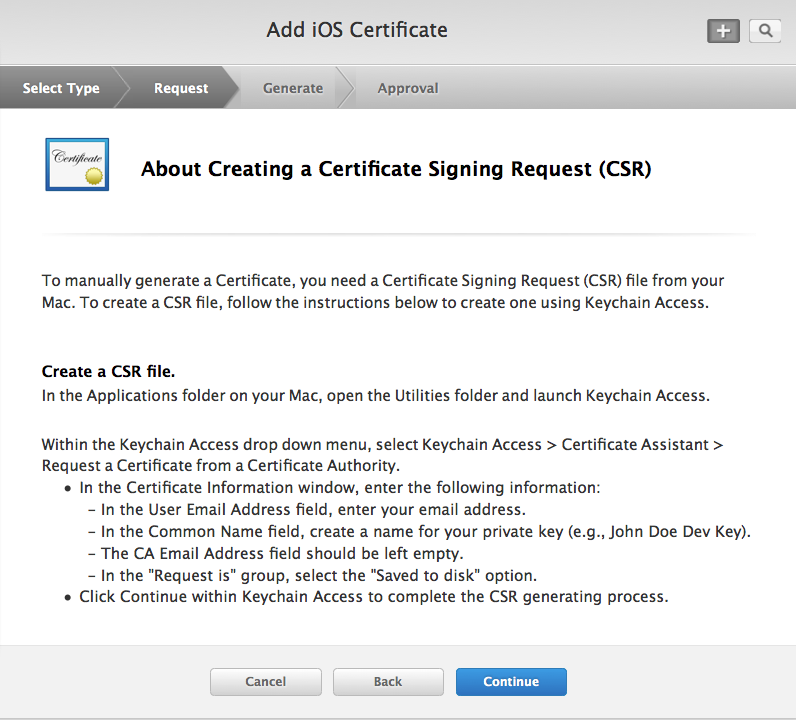
This screen basically tells you how to create a CSR file that you need for the creation of the certificate. If you do not know whether you already have created such a file, I recommend entering ‘certSigningRequest’ in the Spotlight search on your Mac. If such a file turns up, you can most probably use it for the creation of the distribution certificate. If not, create one according to the manual.
After you have created the CSR file, head to the next site:
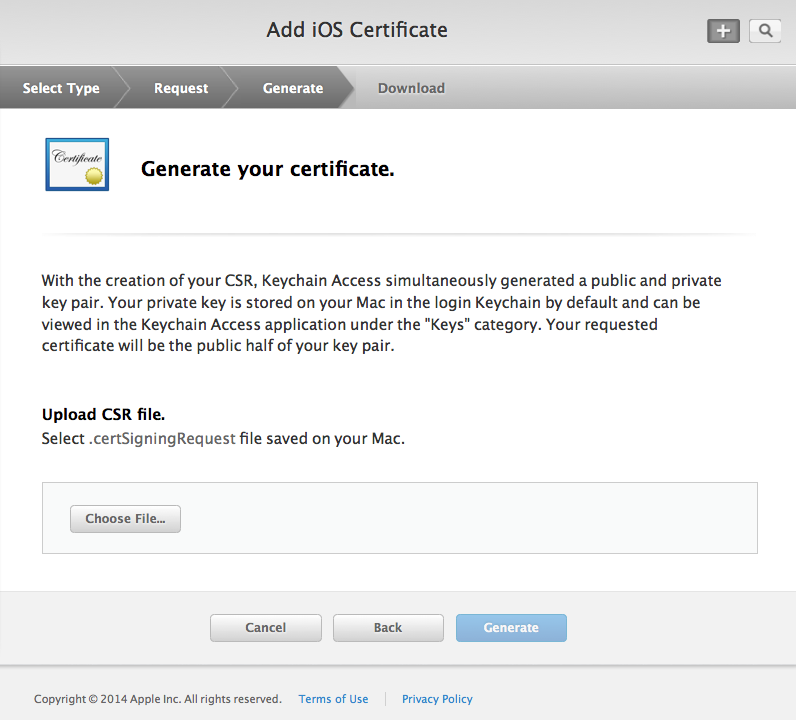
Choose your CSR file and click ‘Generate’.
Now your certificate has been created:
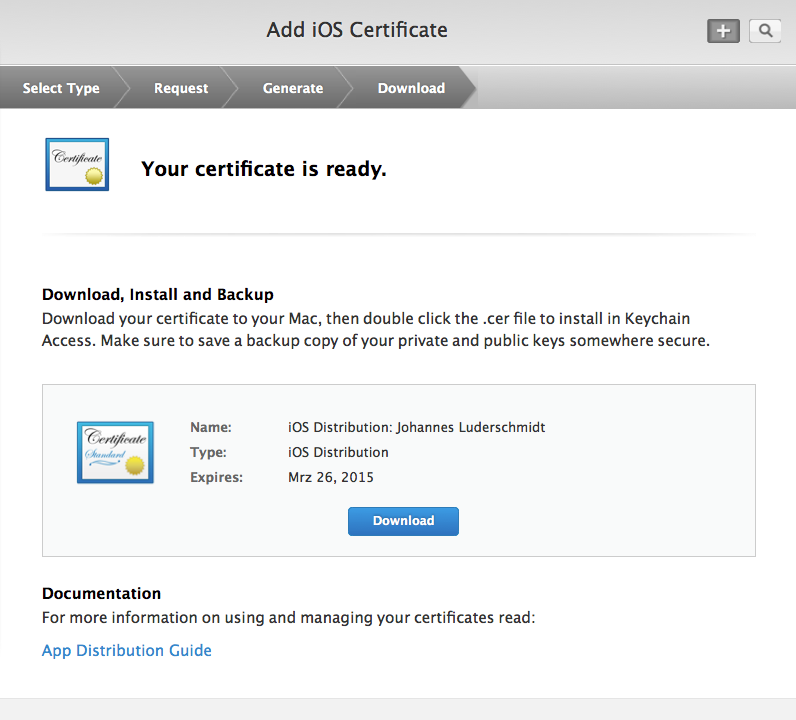
Download it and double-click it to install it in the Keychain.
Create the provisioning profile
To create the distribution provisioning profile, head over to the ‘Distribution’ section of the ‘Provisioning Profiles’. Tap the big plus button on the upper right. Now you see this:
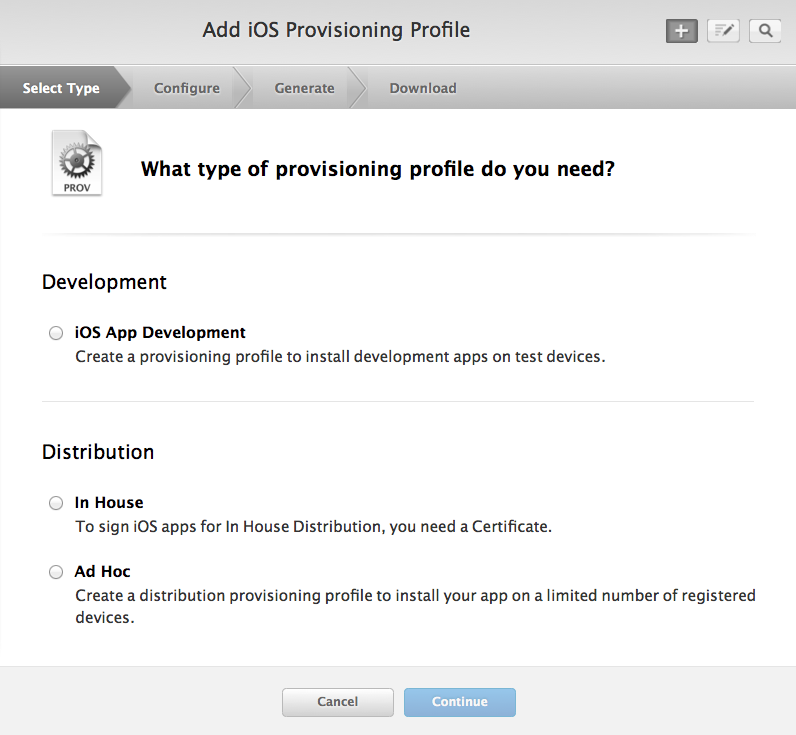
Choose ‘In House’ and click ‘Continue’. Choose the App ID that you have created for your app:
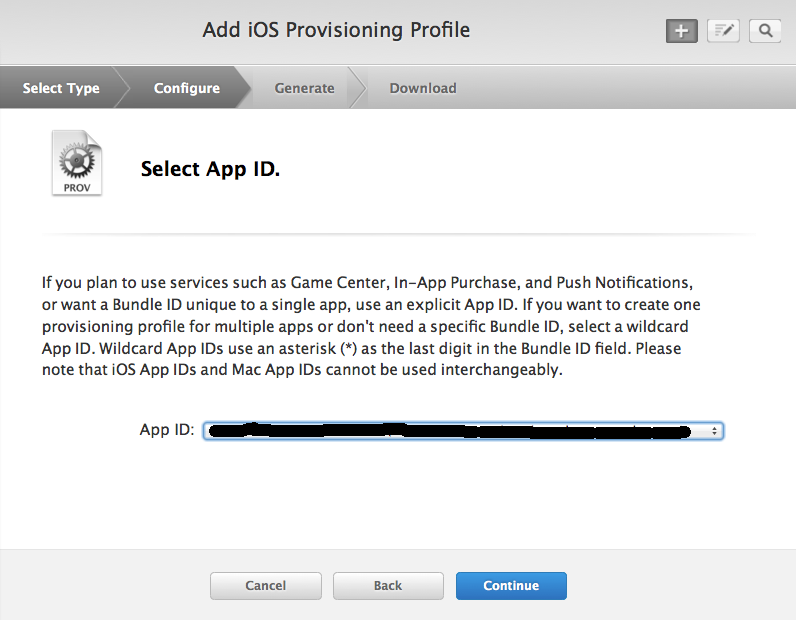
Click ‘Continue’. Now select the correct distribution certificate:
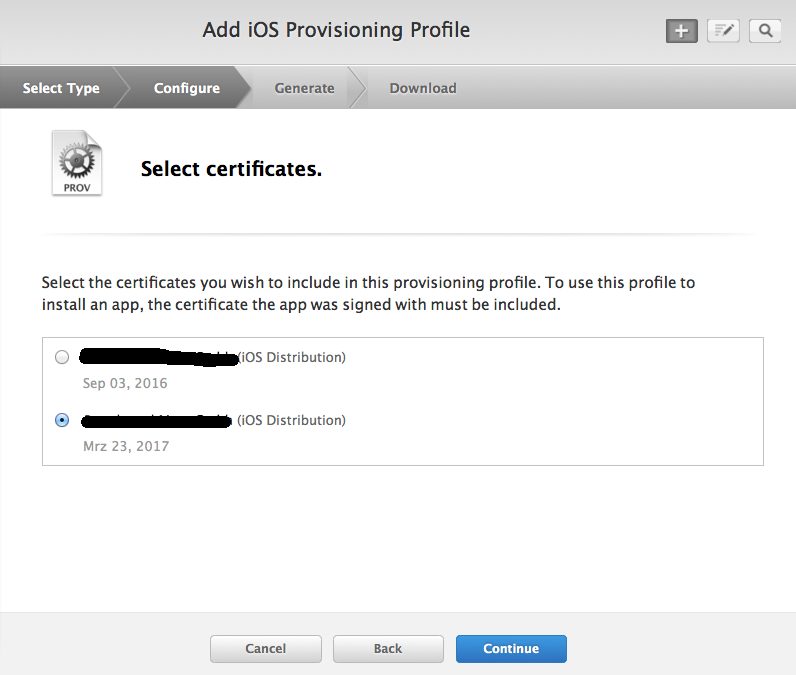
Click ‘Continue’. Finally, name your provisioning profile and click ‘Generate’.
Download the generated profile and doubleclick it to install it:
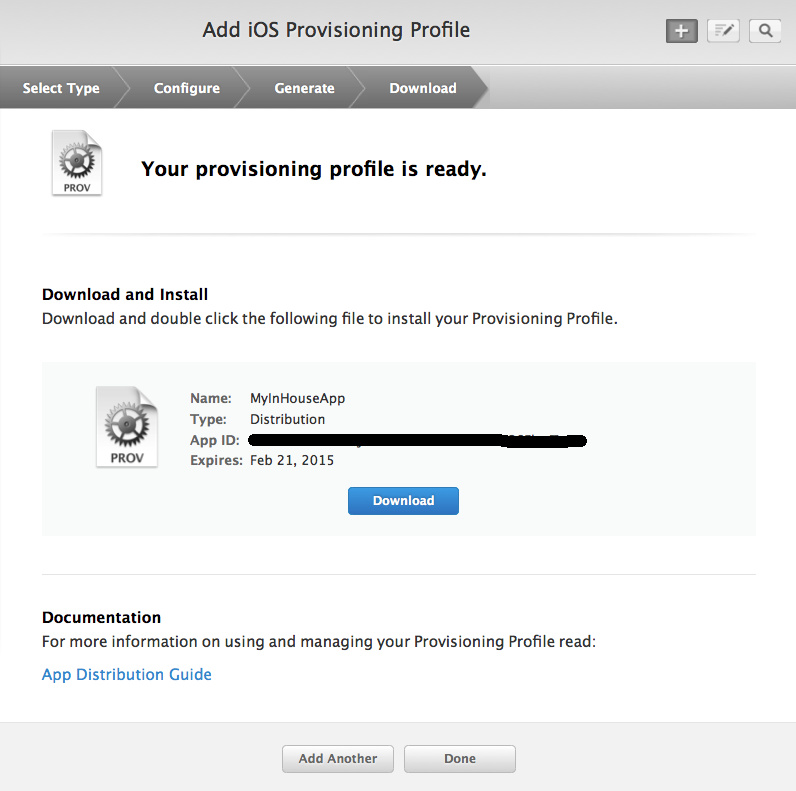
Create the IPA file and the manifest
Switch to Xcode to create the IPA file. Click the project name in the upper left. Select the project name in the targets in the center area. Select ‘General’ on the top. In ‘Team’, choose the name of the team of the iOS Developer Enterprise Program. (For this article’s purposes I have selected the team from my private account. Use the enterprise team instead!):
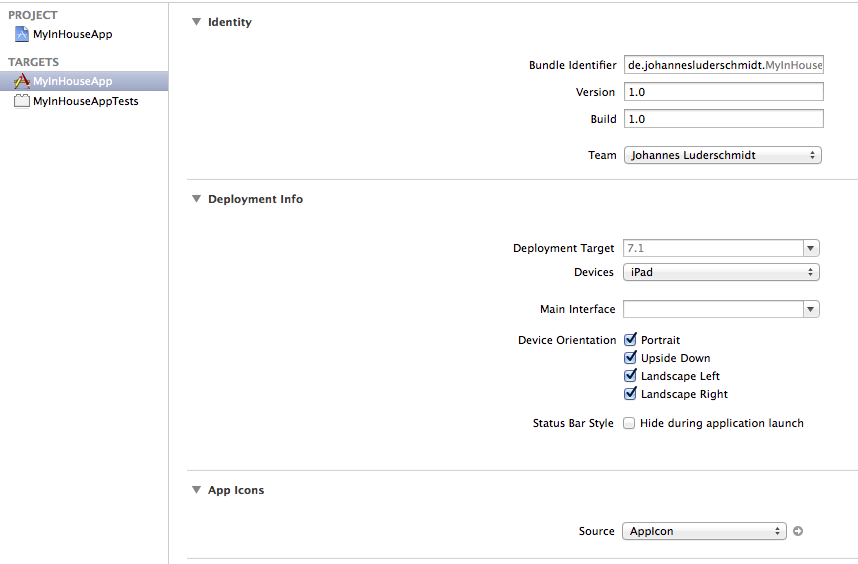
Click on the project name under ‘Project’ in the center area. Click ‘Build Settings’ on the top. In ‘Code Signing’ select your distribution certificate in all fields:
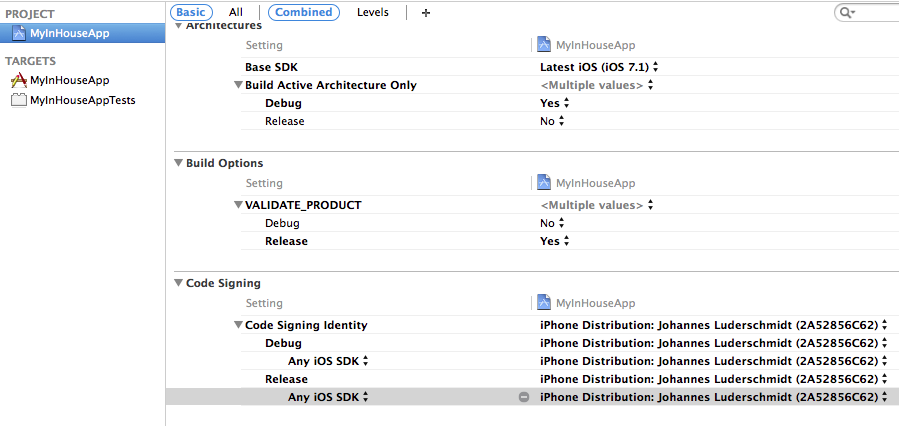
Back to the targets in the center area. Click on the project name under ‘Targets’. Click ‘Build Settings’ on the top. Choose the distribution certificate in Debug, Any iOS SDK, Release and Any iOS SDK. Under provisioning, choose the provisioning file that you have created:

Keep in mind that with these settings you cannot run the app from Xcode on you device anymore. These settings are for distribution only. (You can still click on ▶ and Xcode builds the project and tries to start the app on the device or the simulator. However, you will see an error message shortly afterwards.) Now, click on ‘Product’ -> ‘Archive’ in the menu bar. If ‘Archive’ is disabled, you have to choose a real iOS device in your run scheme in order to enable the ‘Archive’ menu entry. Run scheme means this:
Choosing ‘Archive’ will create an archive of the app. In order to be able to create an archive, you need to have the appropriate provisioning profile installed as explained above. After the archiving has been performed, Xcode shows the archive in the Organizer:
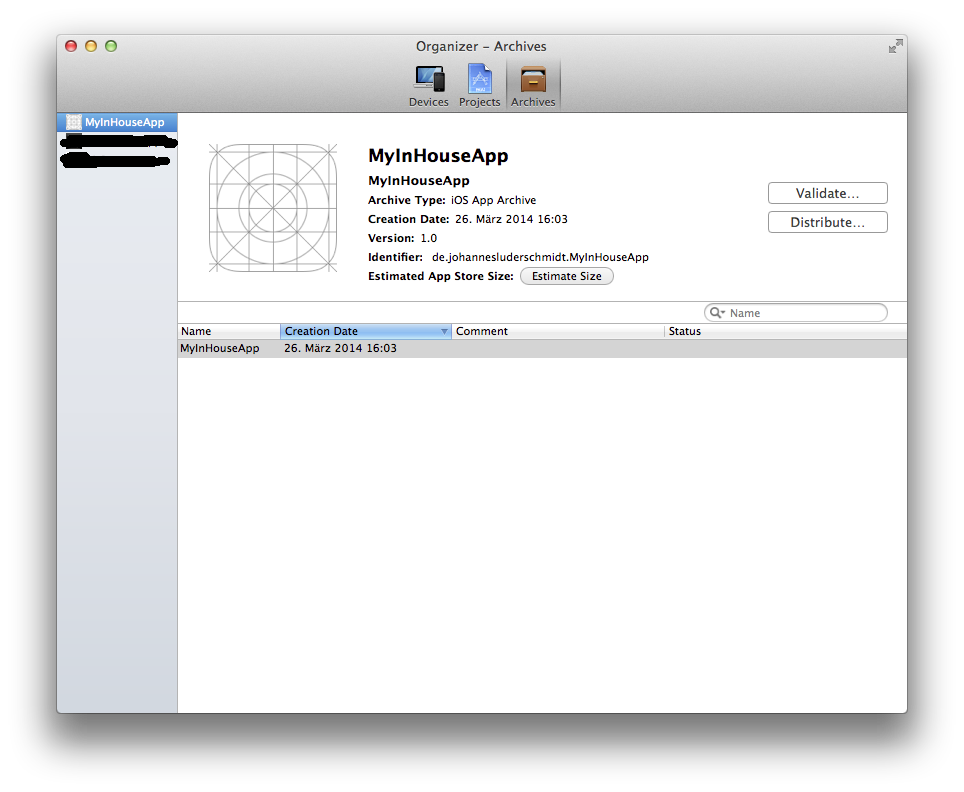
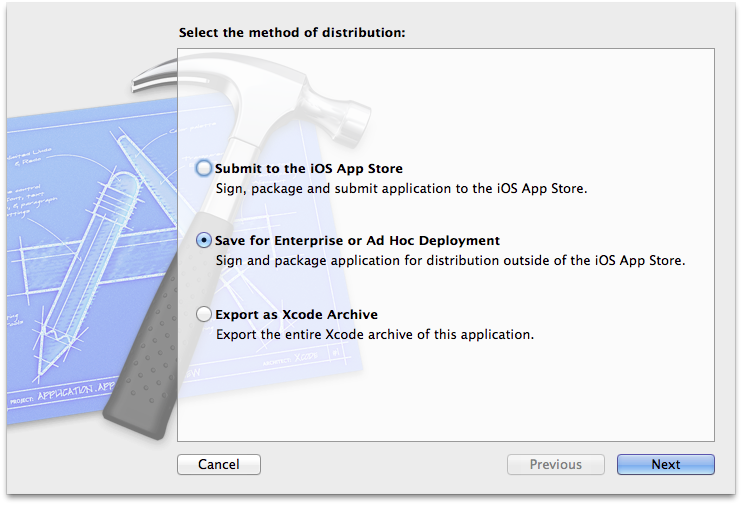
Click on ‘Distribute…’, and choose ‘Save for Enterprise or Ad Hoc Deployment’:
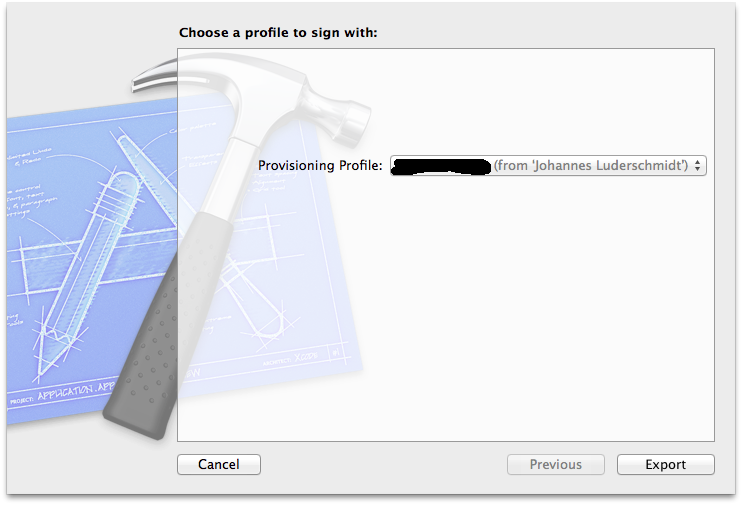
Choose the provisioning file that you have created in the drop-down menu in the next step:
In the next screen, tick ‘Save for Enterprise Distribution’. Some text fields will appear that allow you to enter information that will be included into an app manifest that will be created in parallel to the actual IPA file. This manifest is a plist file that you can edit with a text editor. So do not worry, you can change the information that you enter into the text fields later on. I filled the fields with the following information:
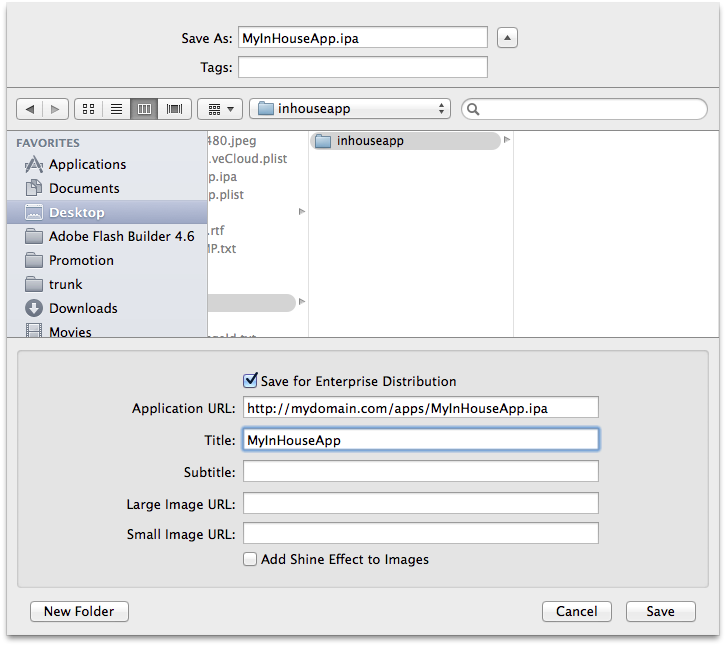
URL is the address of the IPA file where it will be accessible on the Internet. Beware: Although in the following of the process everything takes place under HTTPS, somehow the IPA URL had to use plain HTTP.
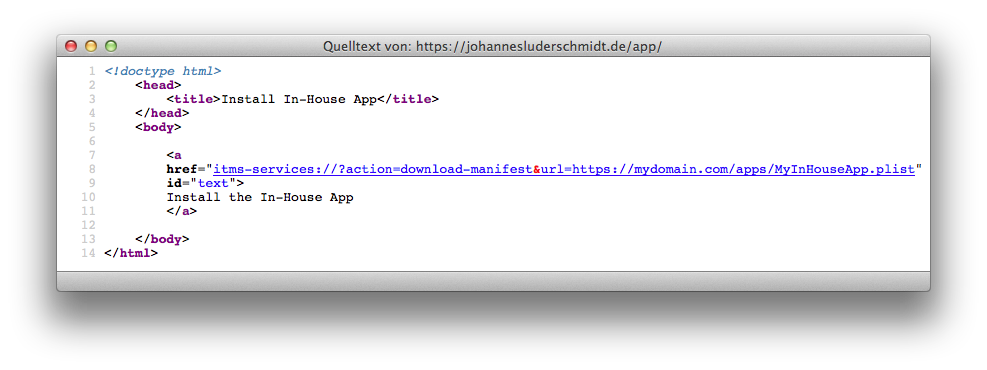
Now you have got two files, the IPA file and the plist manifest. Upload them to your server (most probably using FTP) to the folder that you specified in the manifest (in this example to ‘mydomain.com/apps’). Now create an html file into which you include the following html tag:
1 | <a href="itms-services://?action=download-manifest&url=https://mydomain.com/apps/MyInHouseApp.plist" id="text">Install the In-House App</a> |
The link to the manifest HAS TO USE HTTPS! Put the html file next to the IPA and manifest file on your server.
Back to HTTPS/SSL: In order to be able to install the IPA file over the Internet, navigate to the html file using HTTPS. This is mandatory since iOS 7.1. As mentioned above, the manifest file has to be loaded via HTTPS also. Contrary to that and as mentioned above as well, in my experience, the IPA file has to be loaded using plain HTTP. Strange thing…
In order to allow the IPA installation, the HTTPS connection needs to be certified by an SSL certificate that is registered for your domain and signed by a trust center. As introduced, such certificates can be pricey. But if you coughed up the 299$ for the iOS Enterprise Developer Program, this will possibly be not an issue for you.
To install the IPA, enter the URL (starting with HTTPS) of the html file in Safari on your iOS device, tap the link and answer the installation dialogs appropriately.
If an error message comes up, the message will most certainly tell you next to nothing. To figure out what is wrong, hook up your iOS device to Xcode and go to the device in the Organizer and analyze the log messages:
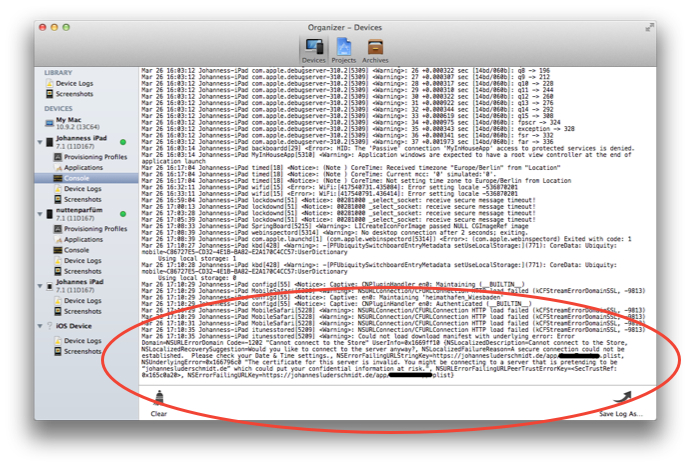
In the example above, I tried to install an app from my domain johannesluderschmidt.de via HTTPS using a self-signed certificate. But after tapping the link, all I saw was an error message stating »Cannot connect to johannesluderschmidt.de«. After connecting my iPad to my Mac, I saw this message in the iPad’s console in Xcode: »NSErrorFailingURLStringKey=https://johannesluderschmidt.de/app/appName.plist, NSUnderlyingError=0x165c7f30 “The certificate for this server is invalid. You might be connecting to a server that is pretending to be “johannesluderschmidt.de” which could put your confidential information at risk.”« You see, while the message in Safari was quite meaningless, the information in the console was quite useful.
So that’s it. Fairly easy, isn’t it? It took me only one day and approx. a million stackoverflow articles to figure all this out ;)
So, I wish you good luck! Questions and remarks are welcome in the comments section below.

